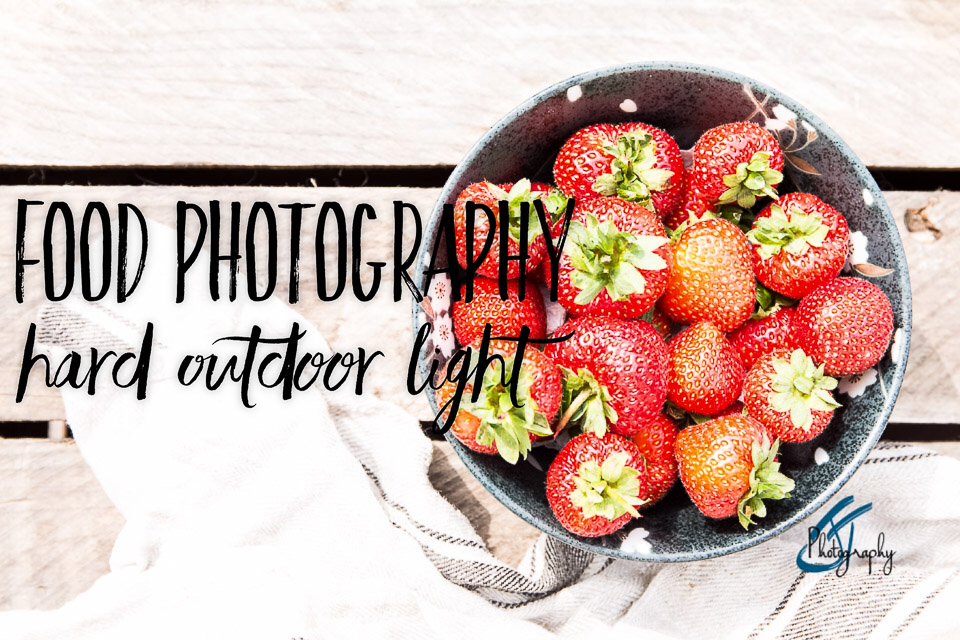
Dealing with hard outdoor light with your food photography
Hello again. Since it’s actually sunny in the UK right now I thought I’d show you one approach to shooting your food outdoors in the sun. I’ll share with you why it doesn’t always work and how to deal with very harsh sunlight to produce an image file you can finesse in post-production.
In the UK it doesn’t seem to stay very sunny for prolonged periods very often. Therefore we like to make the most of it and get outdoors. At least I do, even though my skin has as much tolerance for the sun as Count Dracula. So you’d think it would be nice to take your food photography outside, and it is, but it comes with a number of drawbacks.
As photographers, we’re always looking for light, and outdoors there’s tons of it, right? Right. Too much light can become as much of a problem as none at all. When you think of sunlight, it comes from all around, a huge wash of light. On a cloudy day, it’s soft and wraps around everything, eating up shadows and concealing any direction. That’s not good for photography. Shadows give depth and texture, they bring character and add to the visual story.
When the sunlight has direction it’s usually blasting down from the heavens slapping everything around the chops. We get hard edge shadows with vast contrast. There’s a gaping chasm between highlights and shadow pushing beyond the limits of your camera’s dynamic range.
What do we do?
On a cloudy day, you need to bring in light, flash is my 1st choice or perhaps a silver reflector may just be enough to give the light direction. So not much different from being indoors. You control the ambient light with your shutter speed and bring in some extra light with direction.
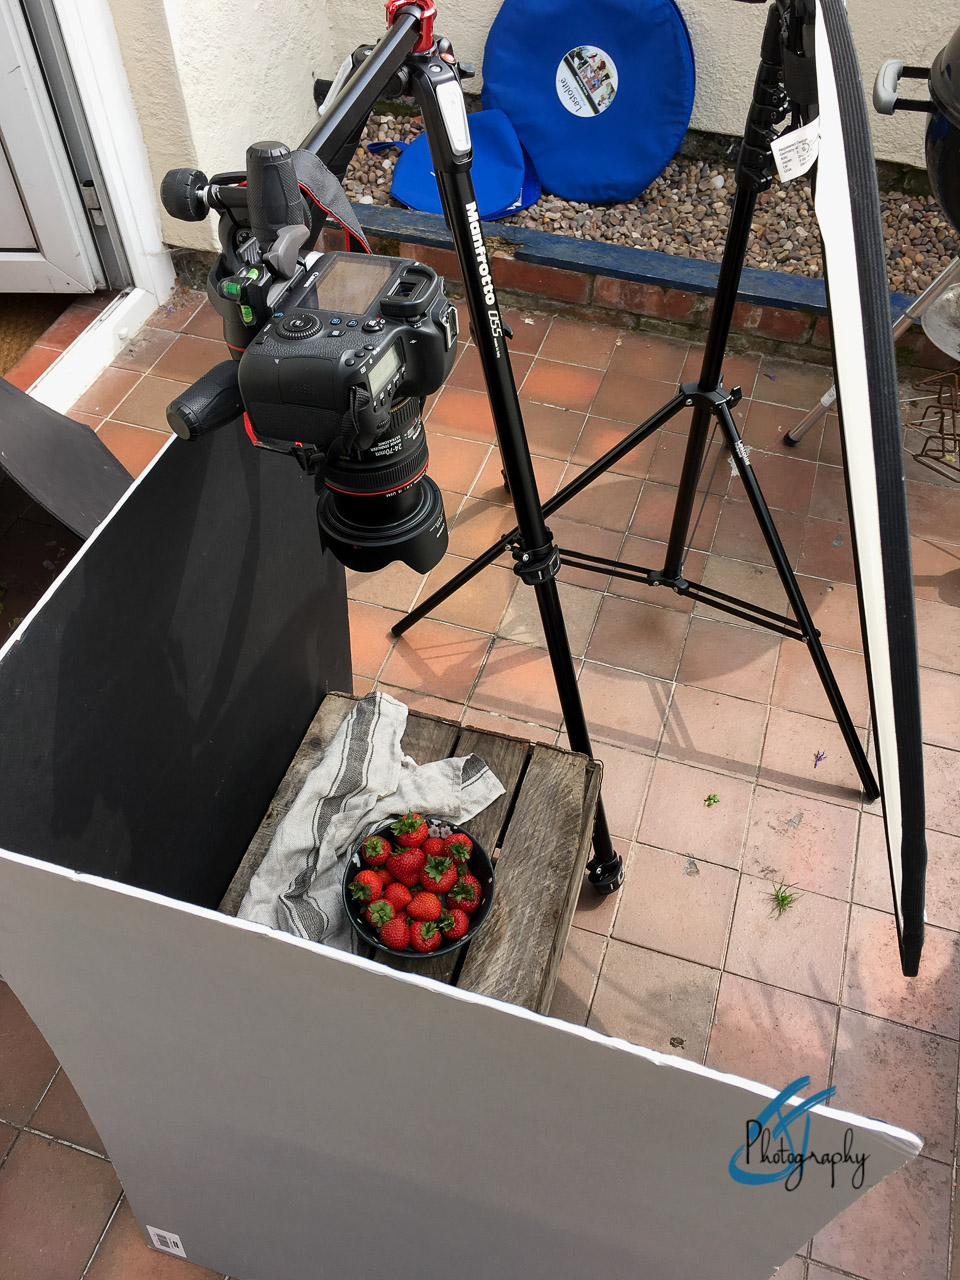
When you have hard outdoor light, you need to soften it with a diffuser and control how much of the ambient light falls onto the scene. I bring in black boards which absorb some of the light, controlling which direction the main light is coming from. You can also bring in flash, overpowering the sun isn’t an easy task but still very doable in food photography.
Hard outdoor light set up
Here’s one solution for you. Once you understand it and practice it, you will be able to bring this new knowledge to many other scenarios.
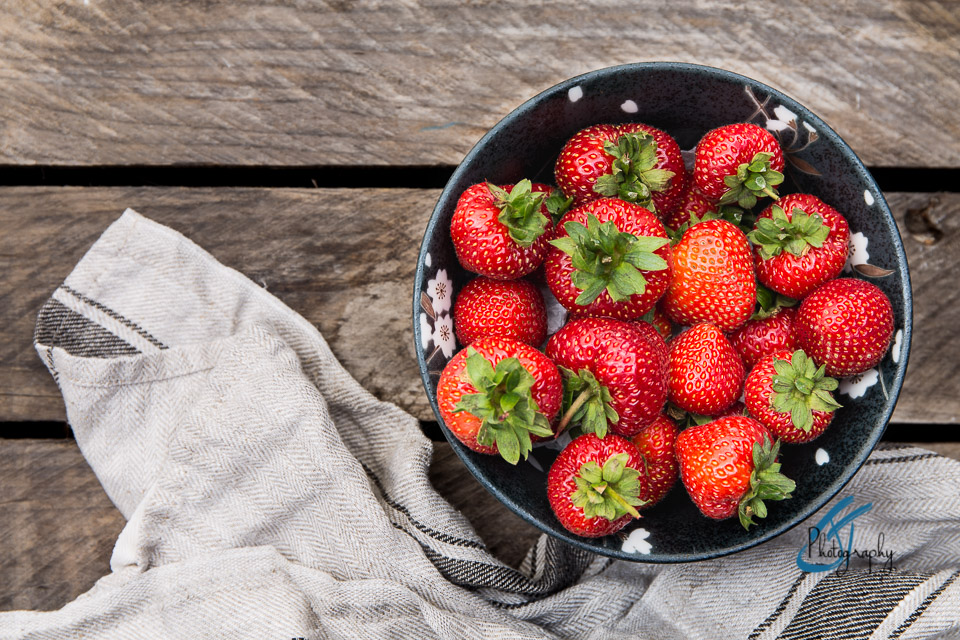
We start with straight out in the sun, pushing the highlights, washing out colours, diminishing textures creating hard edge shadows.

Next, we defuse the sunlight with a diffuser. It’s acting like the clouds do, softening the harsh sunlight but keeping the light’s direction. I’m using a 1 stop defuser Lastolite Trigrip.
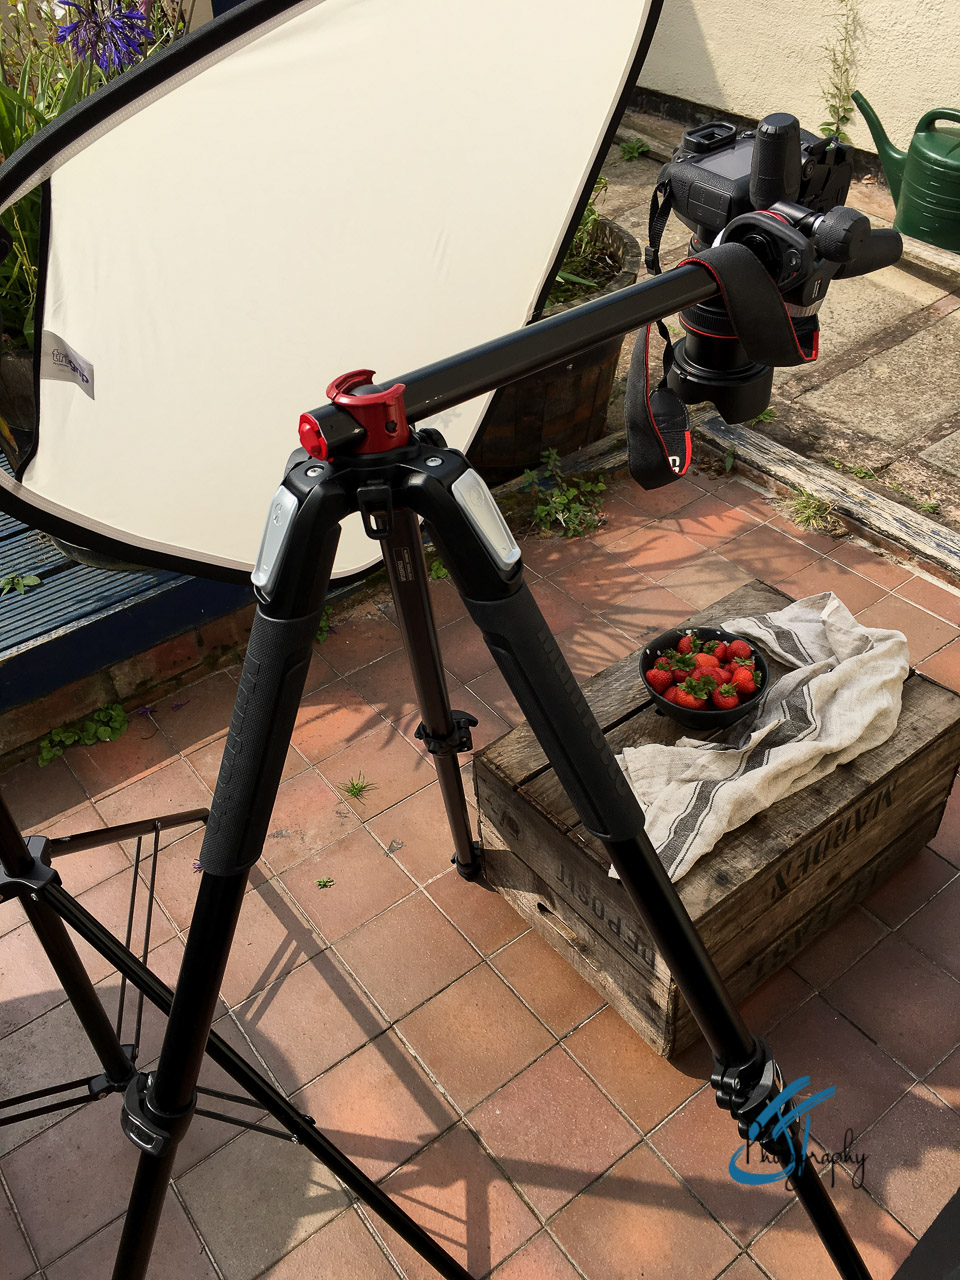

Now we’ve softened the light but kept the direction, we need to control the light falling onto the scene. That’s when I bring in a black board and start by placing it on the opposite side to the light source. This begins to bring the shadows back, absorbing the light. Perhaps you could think of it as a negative reflector.
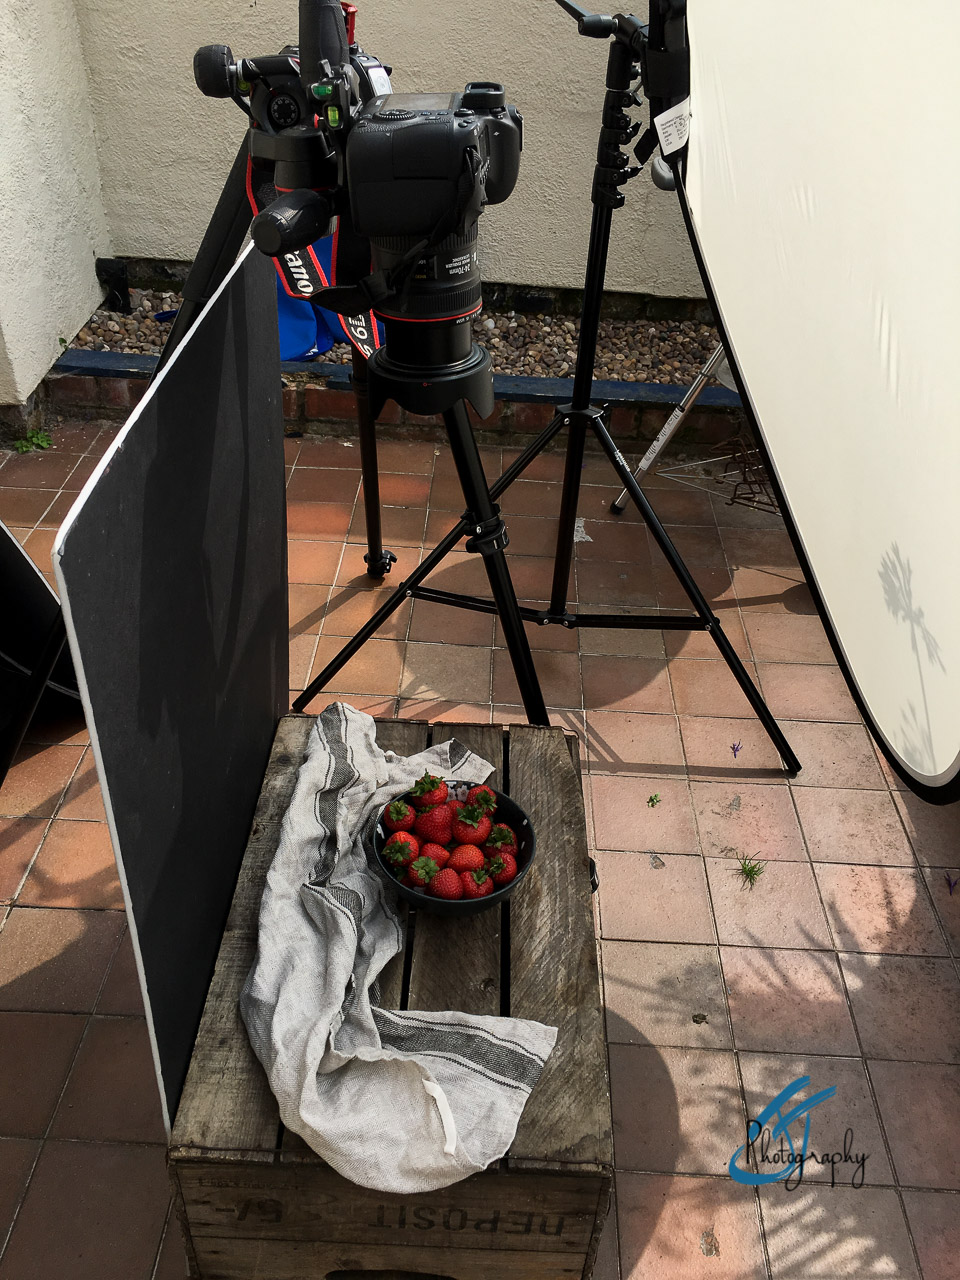
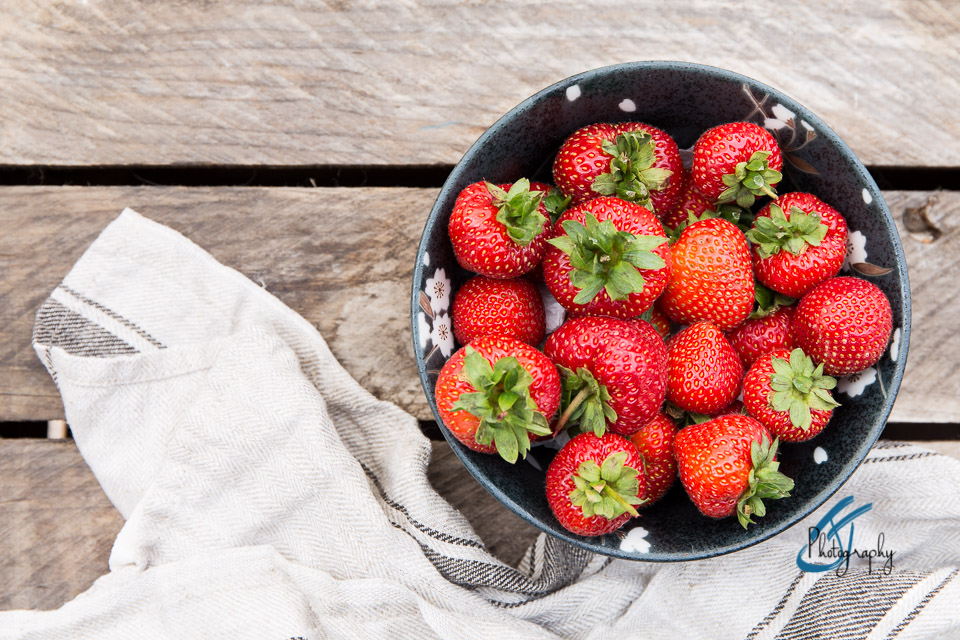
Even though we’ve softened and reduced the light, absorbed some of the light, the scene still seems over lit. Now I bring in the 2nd black card, creating an L shape around the scene, absorbing more light, but from a different direction. Remember hard outdoor light created a heck of a lot of light. It bounces around all over, off everything and in all directions. You need to control some of it, but only as far as your photography scene requires it.
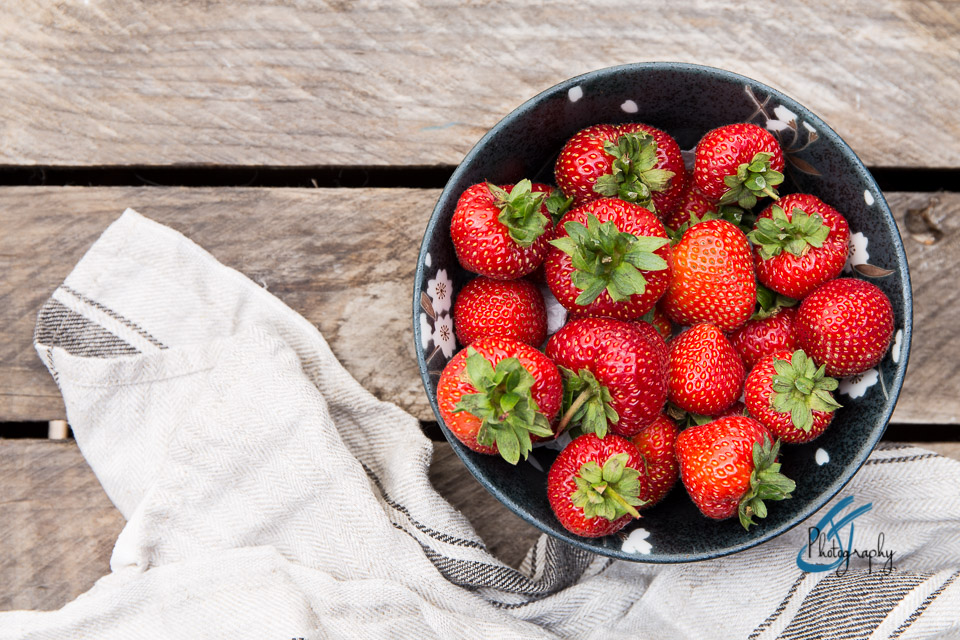
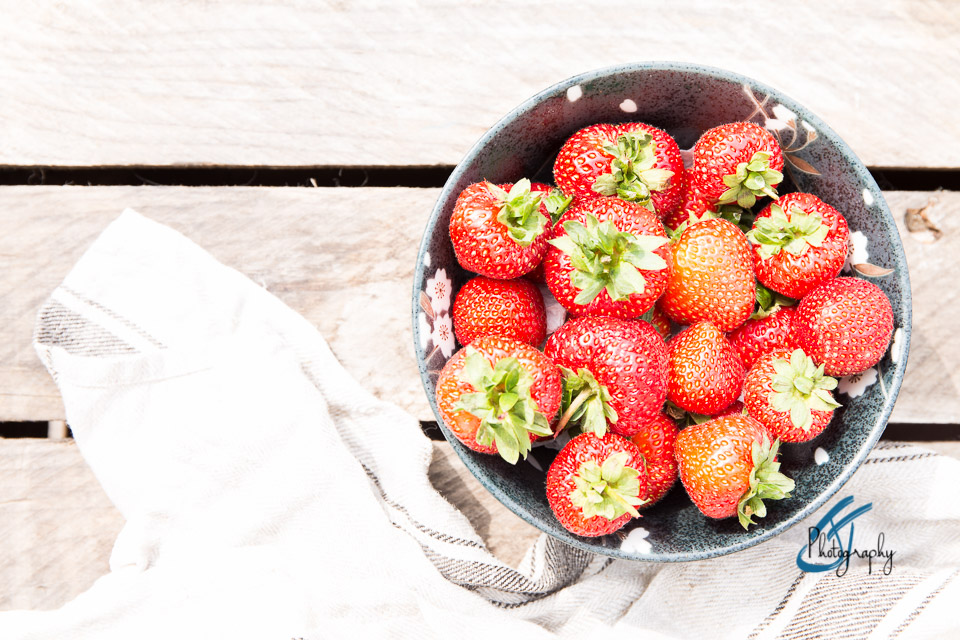
We’ve now ended up with a useable image. One that has a soft, directional light source and shadows bring depth and dimension. All of this within the dynamic range of your camera. A quick bit of editing in Lightroom and the jobs a good’un.
Hard outdoor light roundup
- Create a direction of light which is soft, bringing the dynamic range of the scene back to a level your camera can cope with.
- Add black board around your scene to absorb some of the excess light that shooting outdoors brings. This creates shadows for depth and dimension.
Ok, that’s it for today. I really hope you’ve found this helpful. Any questions, pop them in the comments below and I’ll answer them for you.
Until next time, have an amazing time with your photography.
![]()