What is the best camera mode for food photography?
Hi guys, I thought I’d continue with some food photography tips, which comes under the best camera settings for food photography kind of heading. This is mostly for beginners so if you’ve got plenty of experience this post probably isn’t for you.
Part of getting the right camera settings is choosing the camera mode you’ll be shooting in. You’ve seen the dial on your camera with a bunch of auto settings and some letters like A, Tv, P, Av etc. I’ll give you a quick run through how the main modes work and if or where you could use them. This isn’t going to be an in-depth, techie kind of affair, just a basic run through and how it applies to food photography.
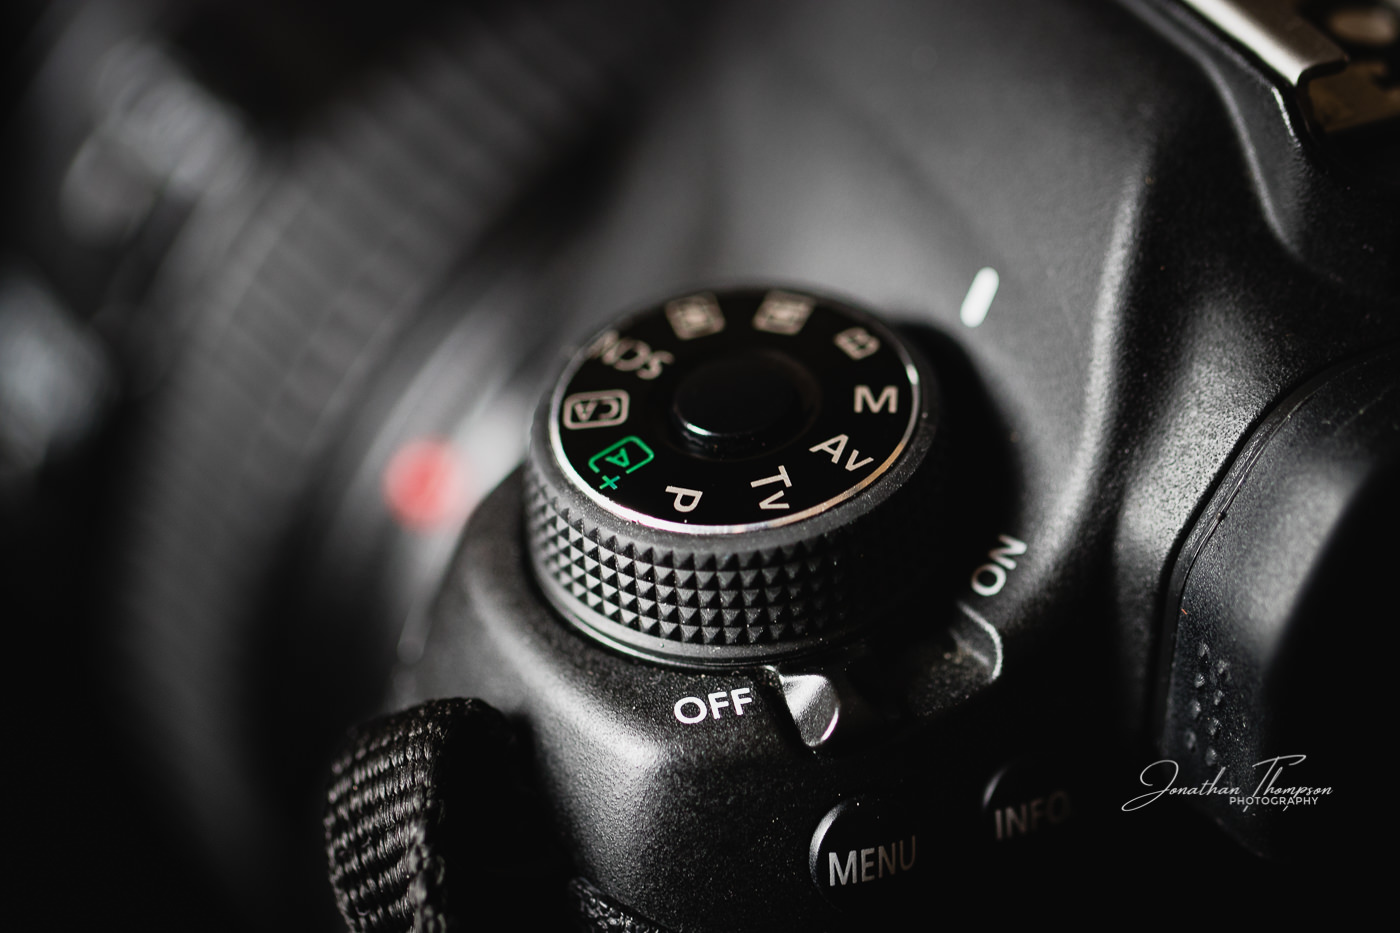
Depending on your camera brand your camera mode dial will probably have a bunch of pictures representing landscapes, portrait and that kind of thing. That’s a side of the dial I never ventured down and I’d encourage you to avoid it too. In fact, beyond a certain price point, I wish manufacturers would stop putting them on. More recent Canon cameras have a full Auto, scene detection, seen here with the green box, I’m sure other manufacturers have the same.
Green square should be avoided. It is total auto, point and shoot mode. Choose nothing and have no say in the photography process.
The other, more important settings are,
- Aperture Priority (Av or A)
- Shutter Priority (Tv or S)
- Programme Mode (P)
- Manual (M)
I firmly believe that the only camera mode you need for food photography is Manual mode. In fact, I use Manual for everything. Lets quickly go through them, just so you’re clear on what they do.
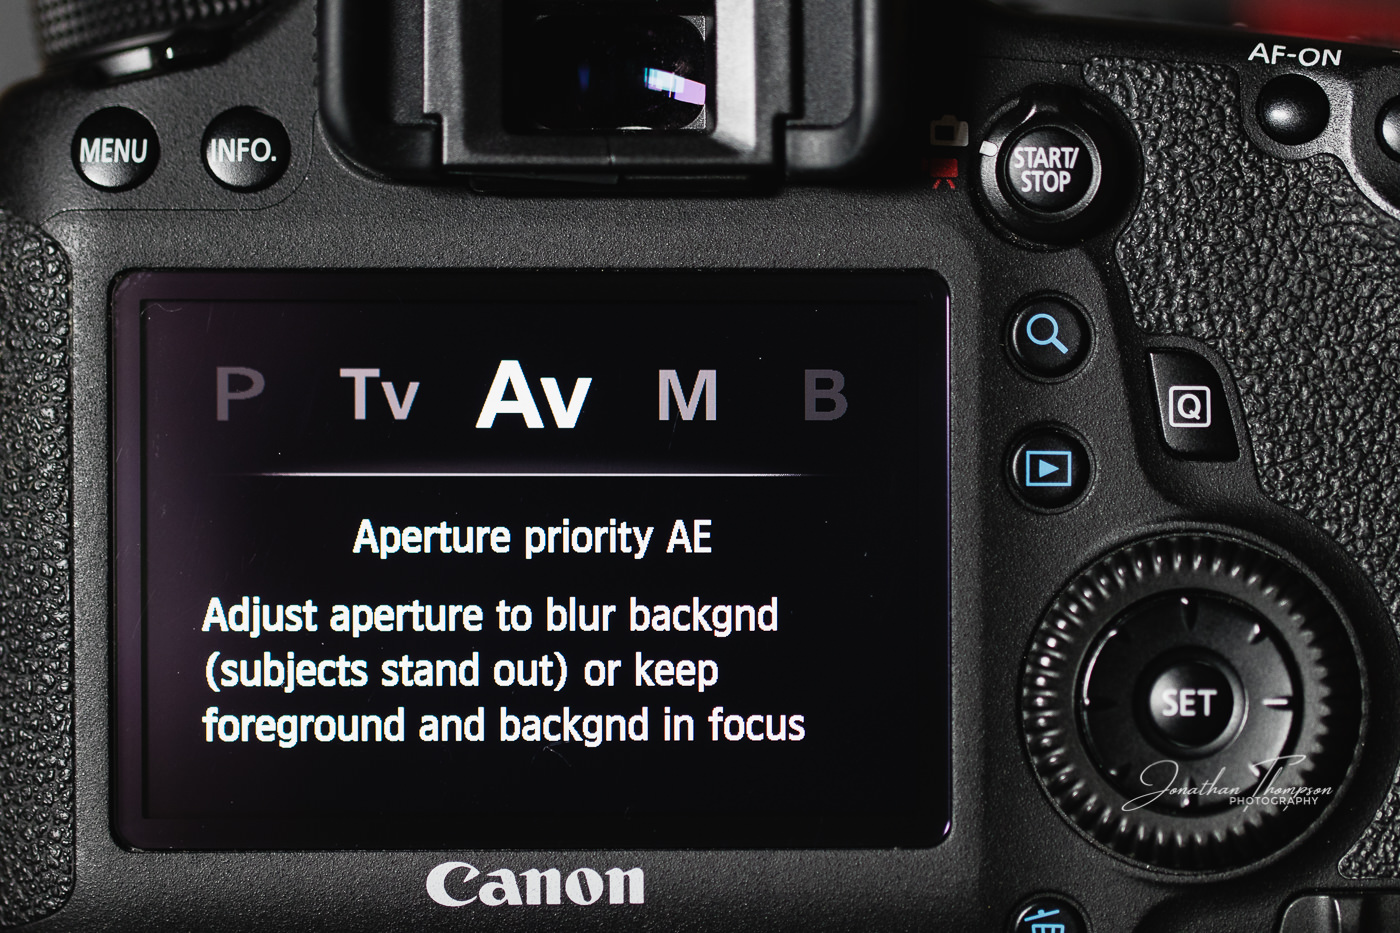
Aperture Priority (Av/A)
Basically speaking, you take charge of the aperture, you give it priority of importance. Think of the aperture as an eye pupil, the wider it is the more light comes into the camera. Wider apertures also mean a shallower depth of field.
The camera will then automatically choose the shutter speed based on your chosen aperture and ISO. You can often have your camera set to Auto ISO as well, so when you choose the aperture and the camera does the rest. Aperture settings are known as f-stops. The lower the number the wider the aperture can go, (f1.2, f2.8, f4) and the higher f numbers result in a smaller aperture and deeper depth of field (Like f8, f 11)
Because the aperture has one of the biggest effects on the look of your food photography, it can be tempting to use this if you’re unfamiliar with manual mode. It will work perfectly well but there is a better way, which I’ll come to.
Share this Post
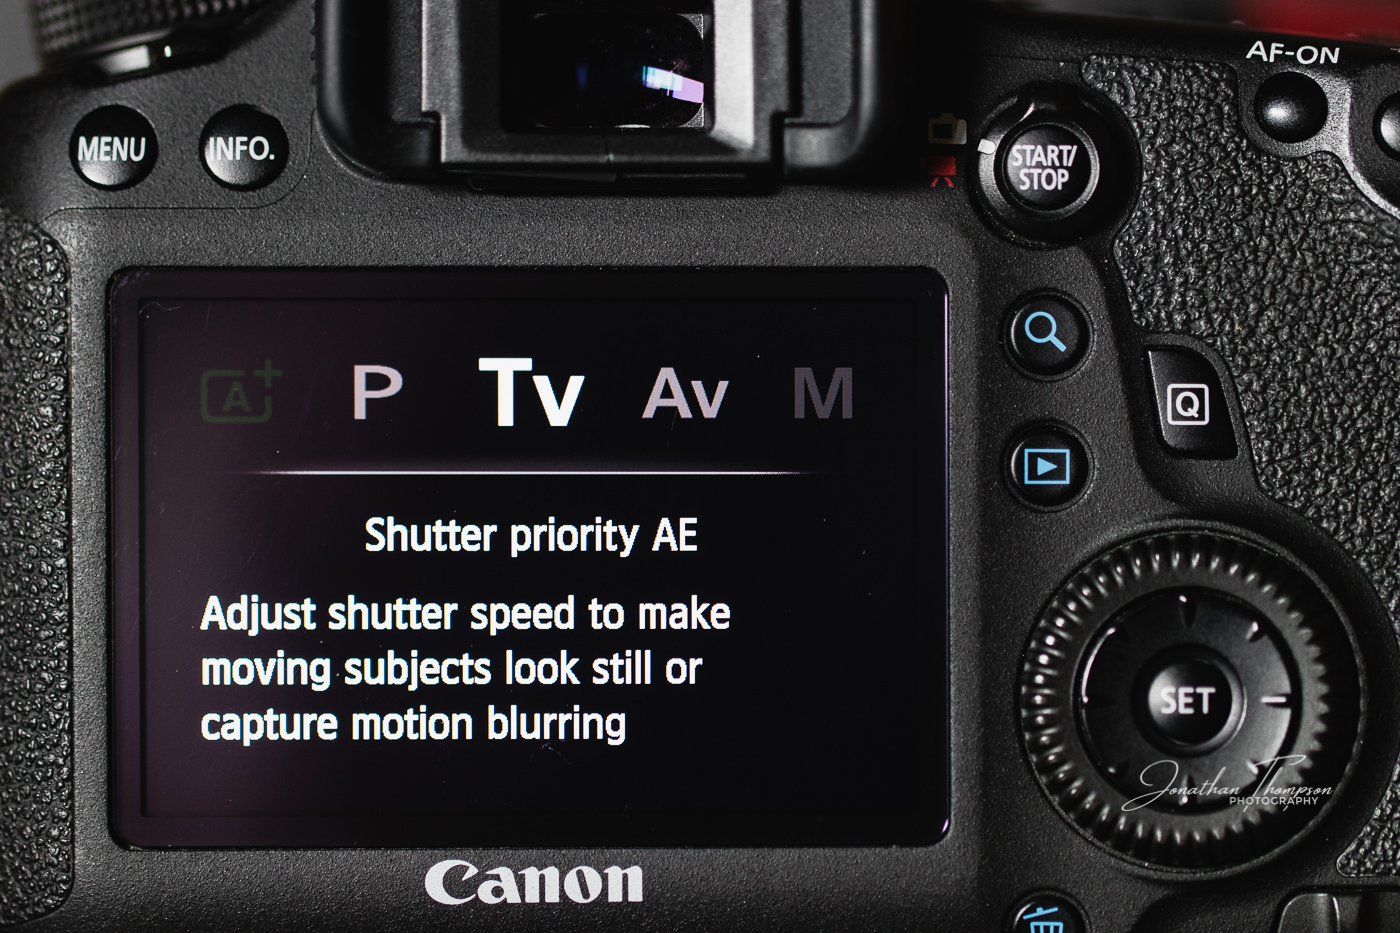
Shutter Priority (Tv/S)
Like Aperture Priority, this camera mode lets you take charge of the shutter speed and the camera decides on what the aperture should be based on the scene and what and ISO are set at.
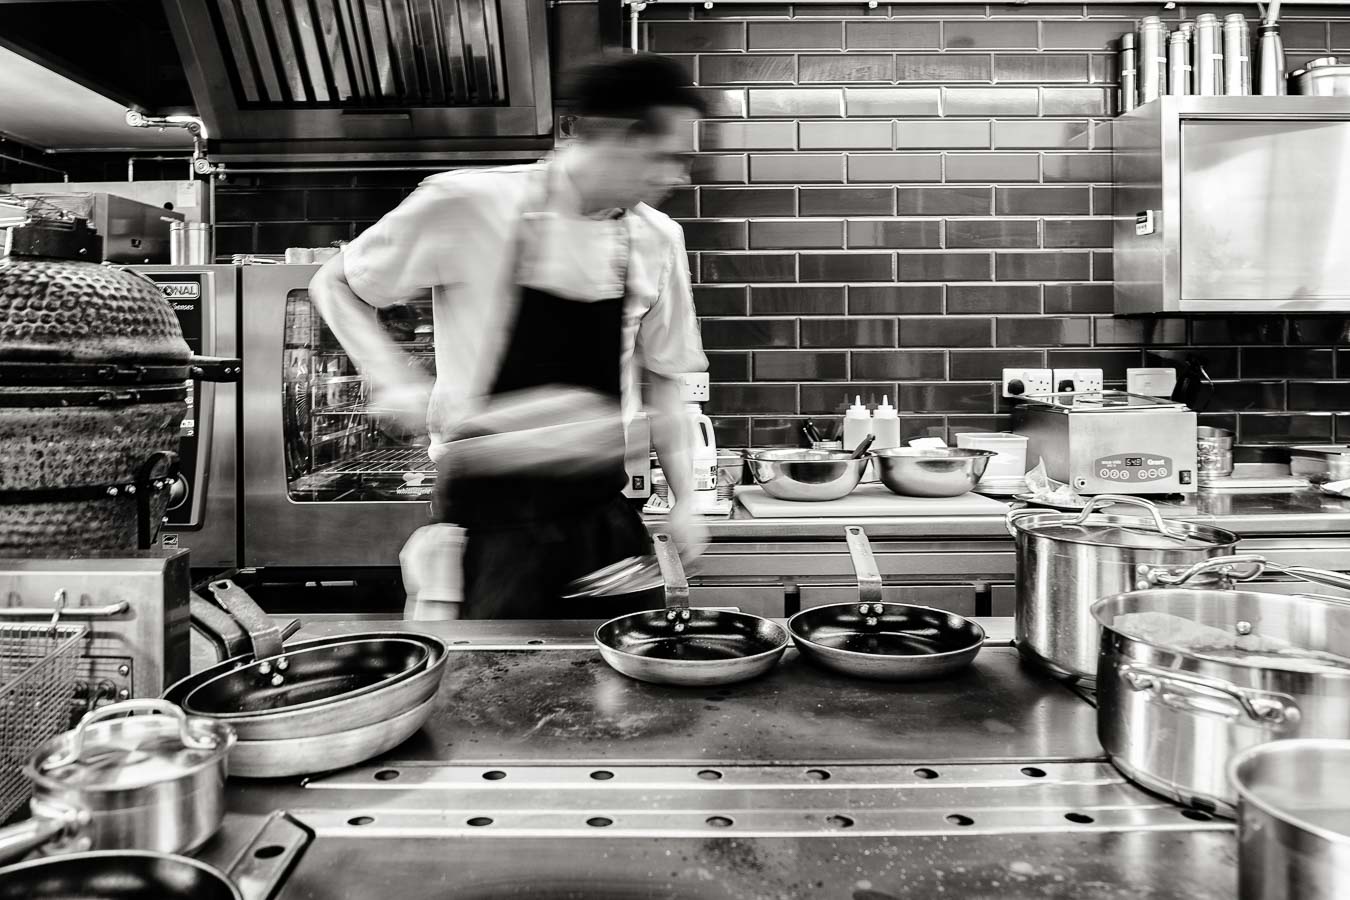
Shutter speed is the speed at which the shutter curtains (2 of them, 1st and 2nd) can open, let the light hit the sensor, and then close again. This is measured in fractions of a second, such as 1/60th, 1/200th. You might use this if you wanted to capture something moving very fast or for creating motion blur by slowing down the shutter speed, such as movement in whisking or a chef in motion.
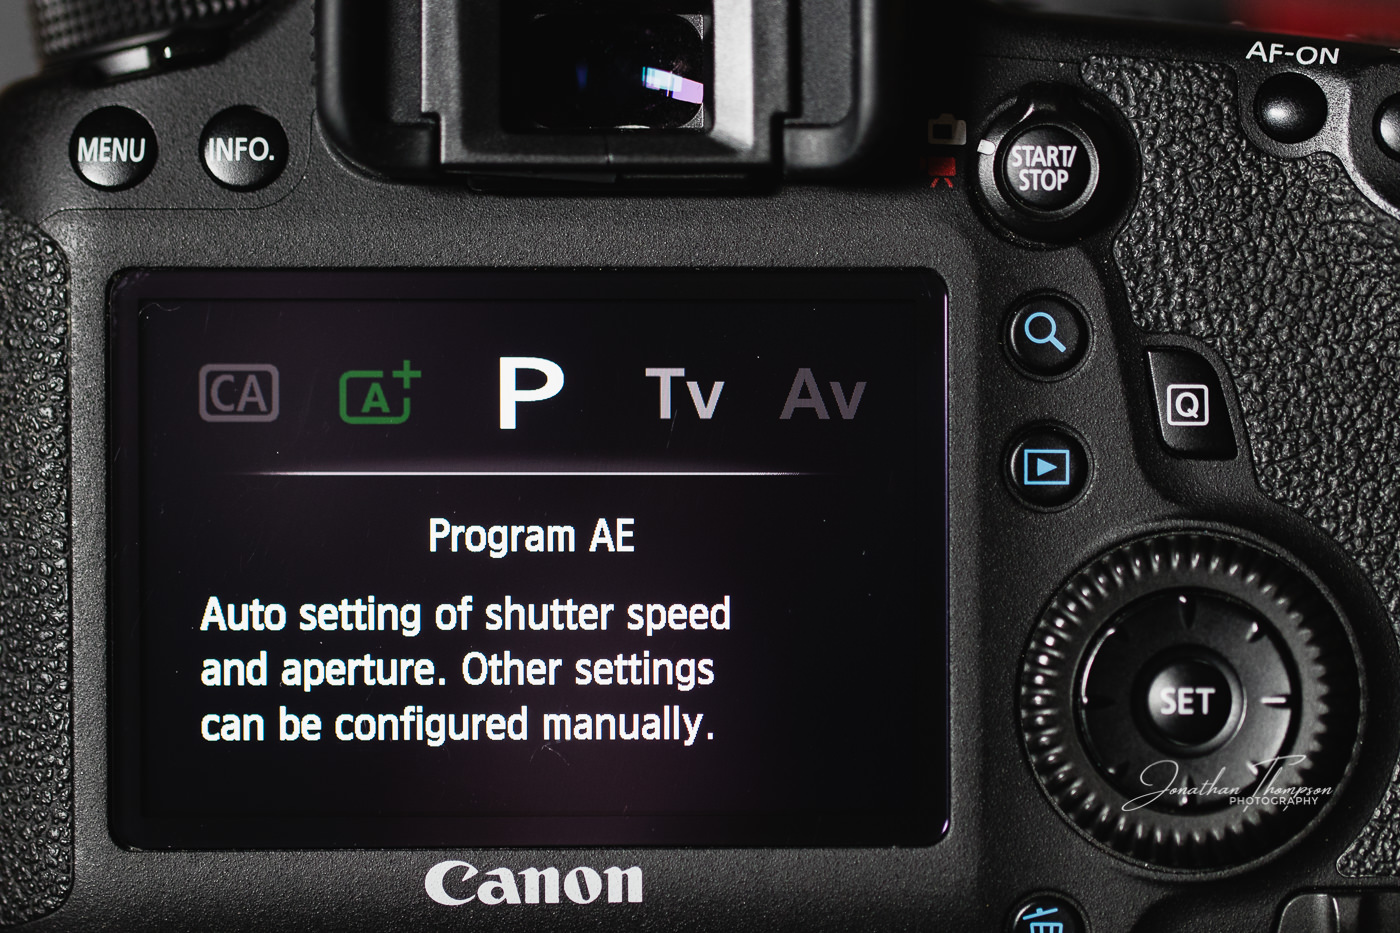
Program Mode
The least useful of the automatic camera modes that I’ll be talking about, apart from full, green square, auto. In this mode, the camera chooses the aperture and shutter speed and the ISO. It does let you then change the aperture and shutter speed if you choose and the camera will adjust the other settings accordingly. Frankly, I’ve never used it and can’t think of a reason to have it on a camera, but perhaps that’s just me. So let’s just leave that one alone, shall we?
If you want a more technical description from the Canon point of view, I’ll hand you over to my buddy Brian Worley…
P is an automatic mode where the camera uses some built-in intelligence to try and give a good looking result. So this means that if you have manually set the ISO to 100 then it will try to avoid camera shake, it knows what lens you are using and will try to use at least 1/focal length then if there’s light enough it will close the aperture to give a moderate depth of field.
Canon cameras have program shift, you can turn the main dial next to the shutter and it will change the chosen parameters – still aiming to give a correct exposure
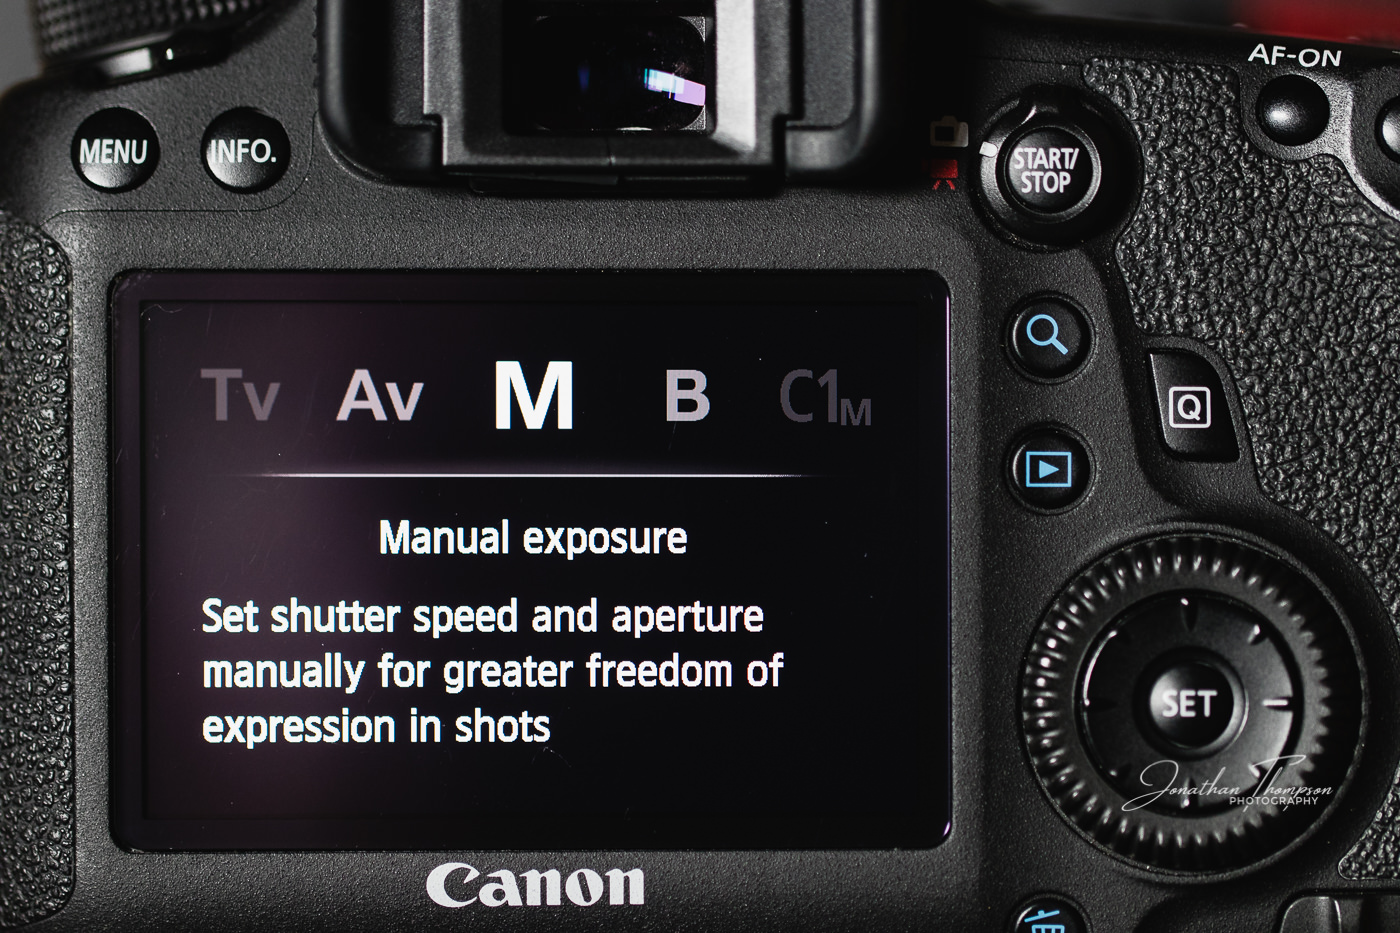
Manual Mode
Ahhh, that’s better. From the least useful to the absolute best camera mode to use for food photography and photography in general, if you ask me.
With manual mode, you are fully in charge of all the settings in the camera. Now before you start to get palpitations, manual mode isn’t as scary as you may have led yourself to believe. As I talked about in a previous post, What camera settings to use for food photography, once you’ve decided on the look you want, using the light you have available, you will have 2 of the 3 settings required for the exposure you want.
This means you only need to change 1 of the 3 in the exposure triangle. That doesn’t sound difficult now, does it? Manual mode gives you full creativity in your photography and you will learn to use your camera so much quicker. Once you have a full understanding of how the camera sees, thinks and operates, you can then use one of the automatic camera modes whenever you feel like it. And now you will understand the whole process so much more and get better use from any other camera mode you choose to use.
Now you have your camera in manual mode
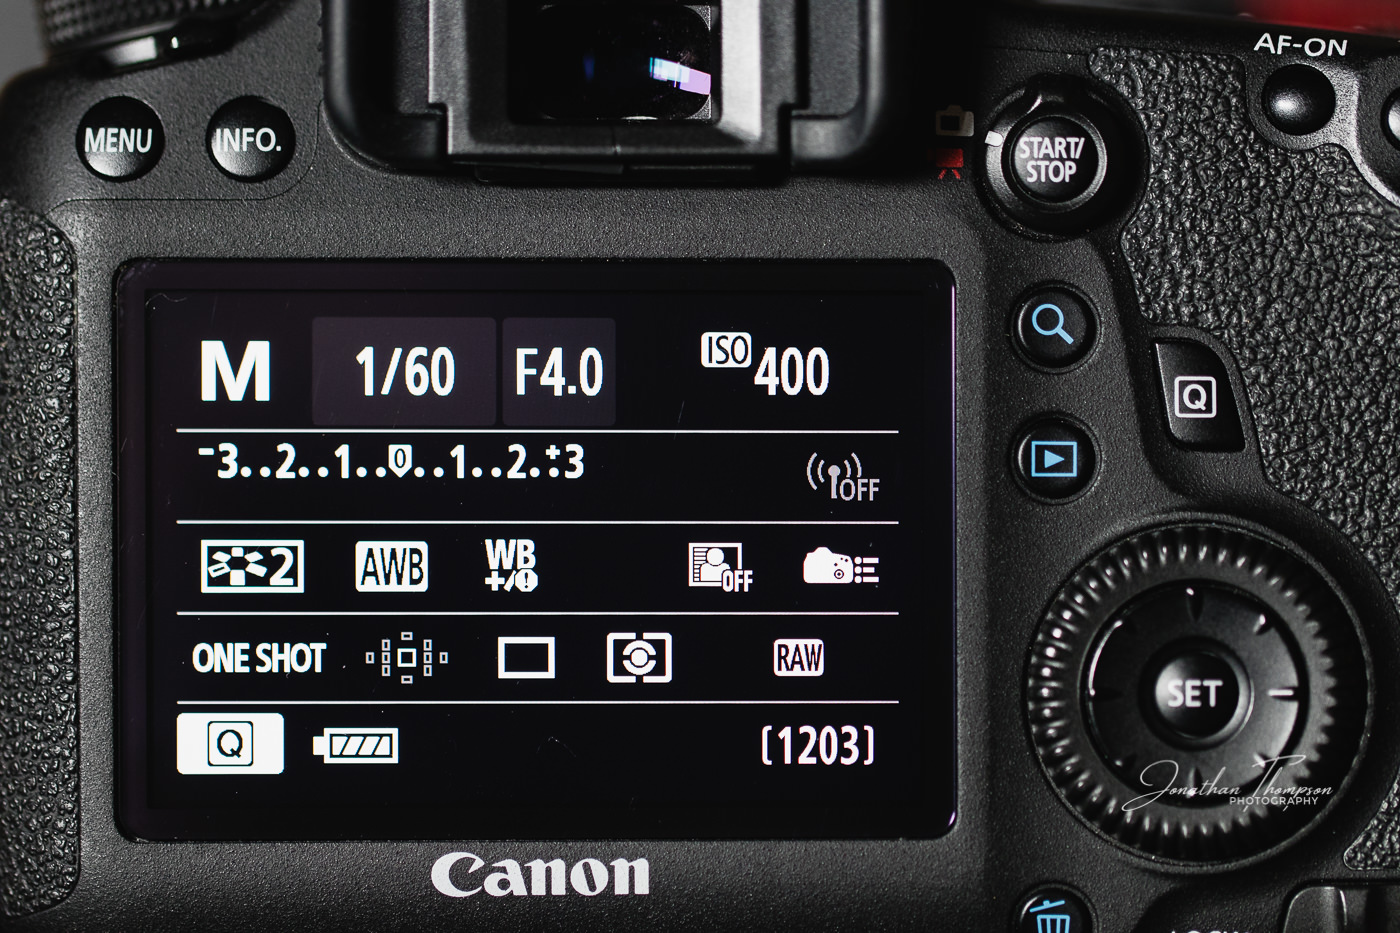
We’ve gone through some of the camera modes and I’ve suggested that manual is the best camera mode for food photography. So we decide on the look we want for our shot. It’s going to be quite a shallow depth of field. The light is good coming through the window. So we set the first two of the exposure triangle.
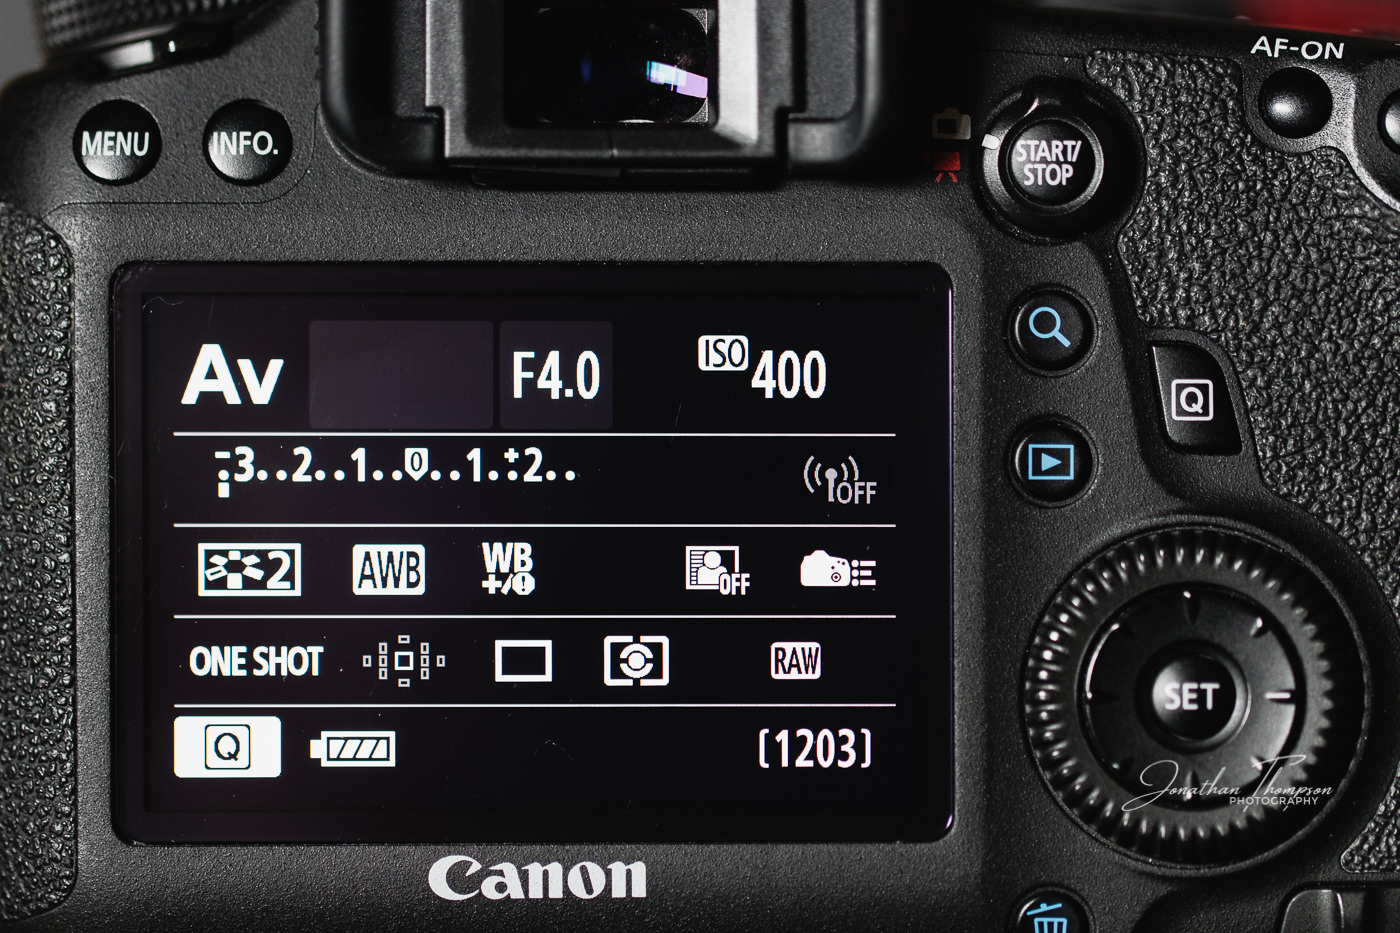
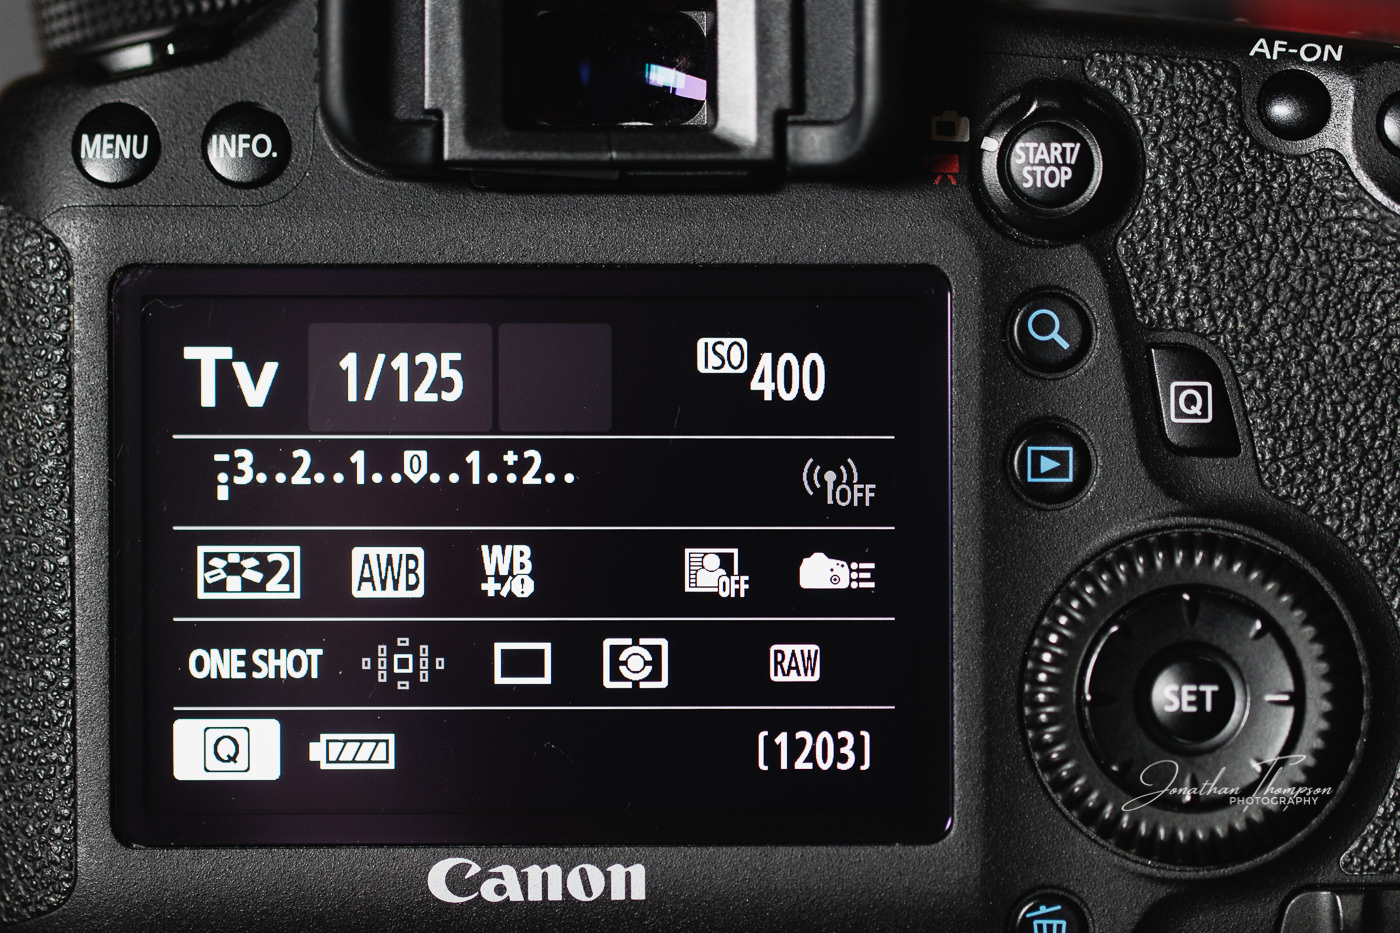
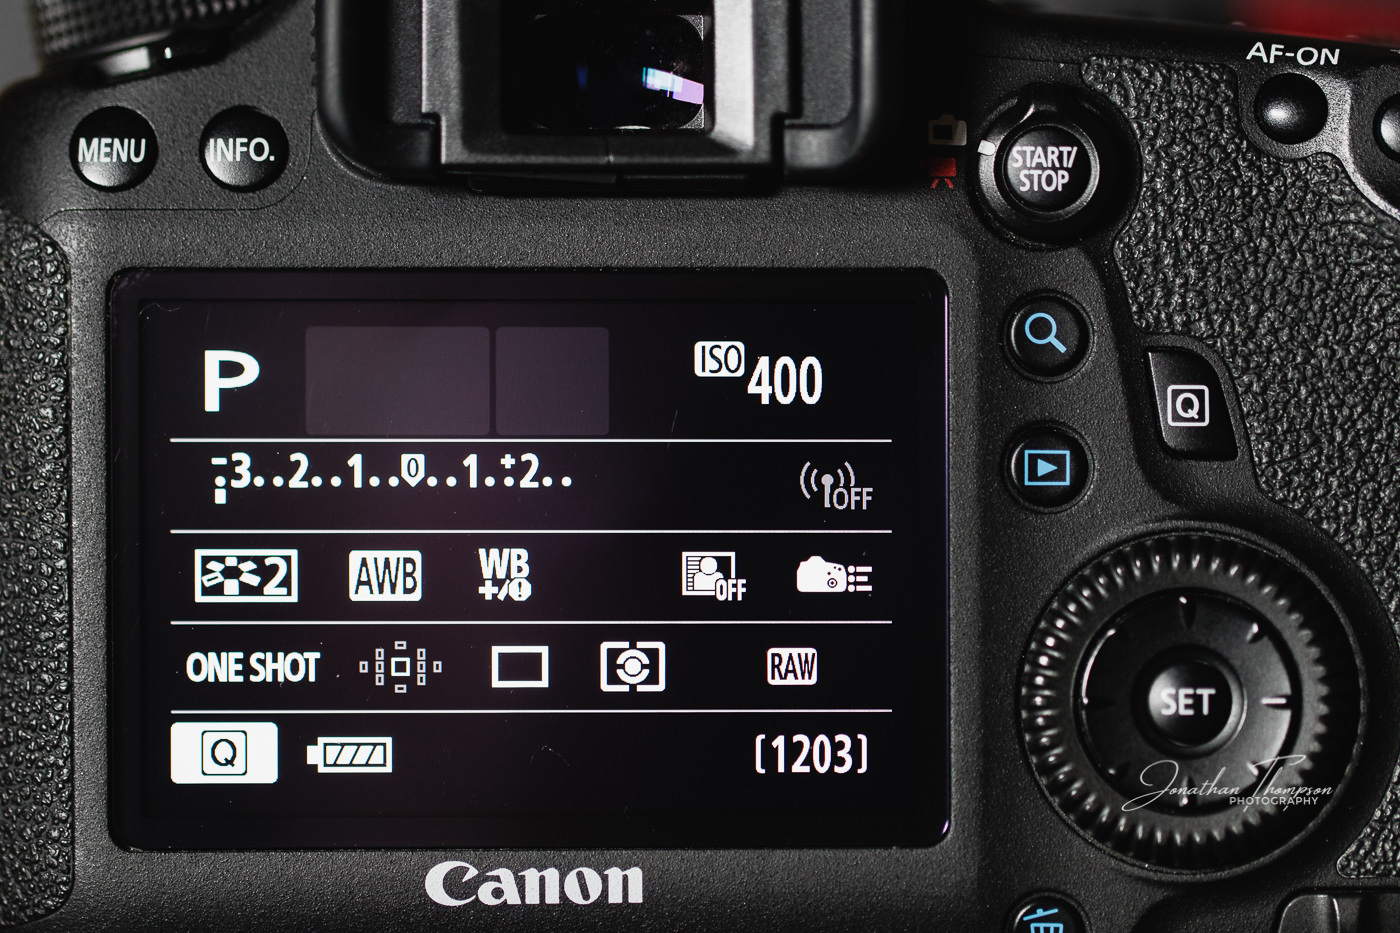
Aperture f3.5, ISO 400 and now we need to decide what the shutter speed is going to be, right? Take a look in the viewfinder or on your info display on the LCD. You’ll see this.
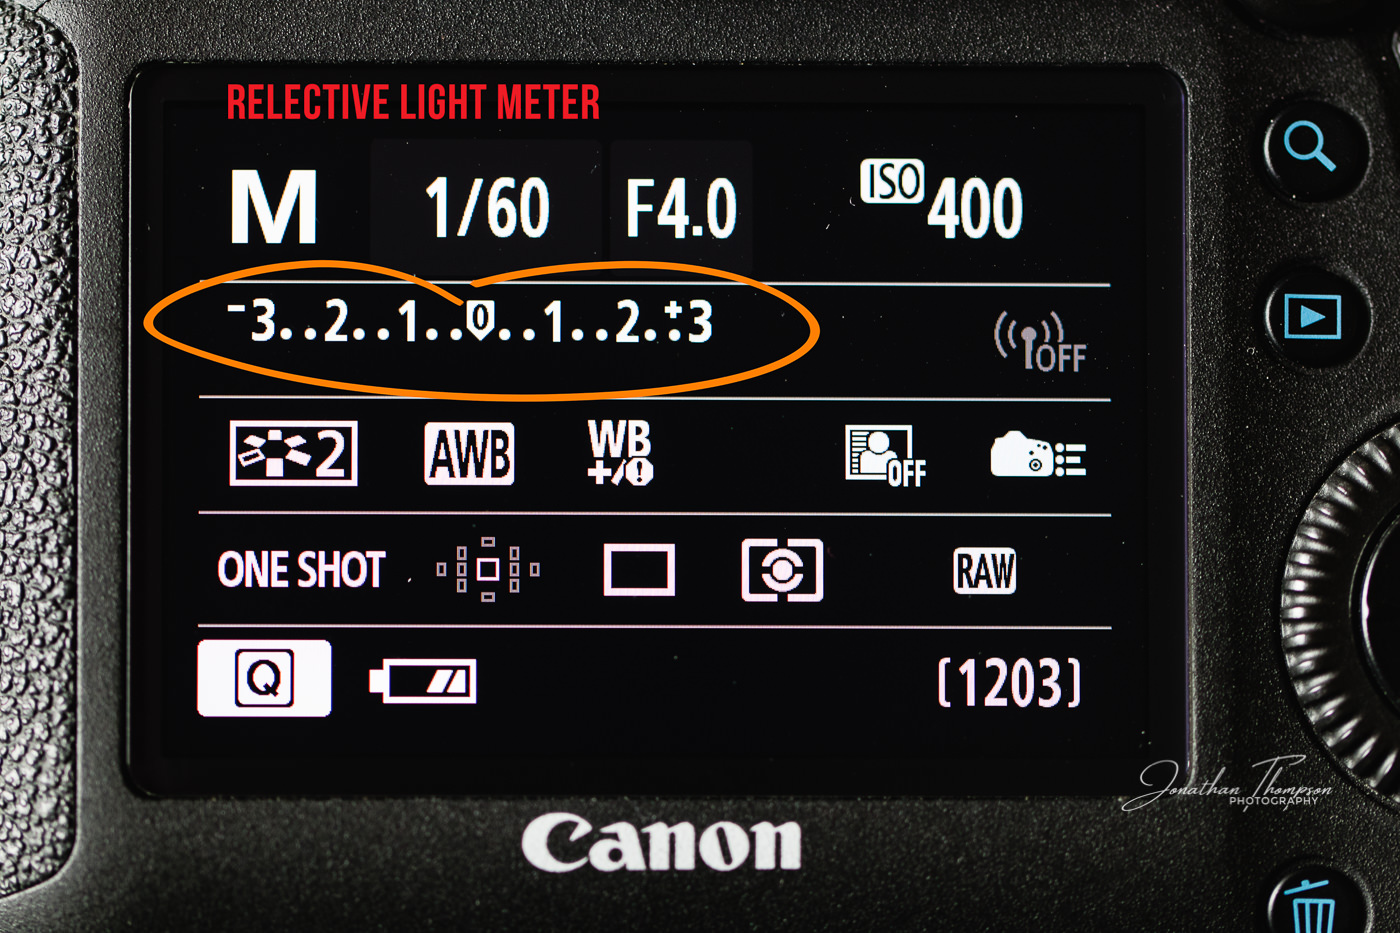
It’s the reflective light meter reading, built into your camera. If the marker is dead centre it means the camera thinks it’s a good exposure. There’s also a plus and minus side for over or underexposure, based on what the camera thinks, plus and minus 3 stops. Change your shutter speed until the marker on the built-in light meter is in the centre and check what that shutter speed is.
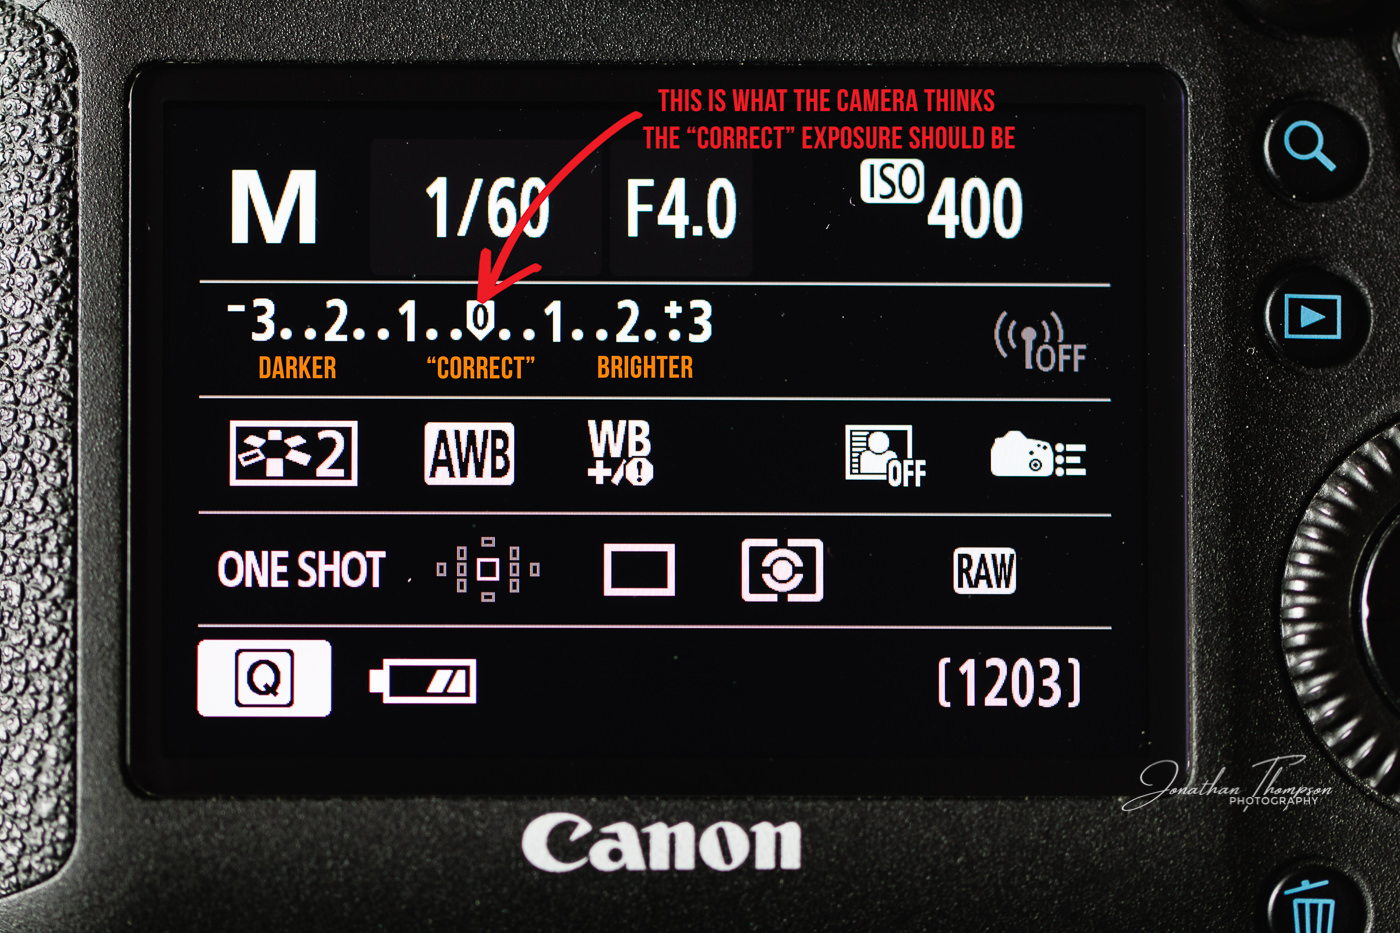
As long as your shutter speed doesn’t fall below, or slower than, 1/60 you’re good to go for handheld shooting. Take a test shot. How does it look? If it’s too bright speed up the shutter to darken the shot and vice versa if it’s too dark. If the shutter speed does fall slower than 1/60 then you might want to think about using a tripod, to keep the camera steady or increasing the ISO which will allow you to use a faster shutter speed.
Share this Post
Which camera mode is the best for food photography?
Manual, all the way. It’s not as difficult as some may think and you’ll learn so much faster by fully controlling the camera yourself. Typically the two parts of the exposure triangle are decided for you, depending on how you’re going to shoot.
- Handheld: Aperture (for the depth of field) Shutter Speed (No slower than 1/60 for camera shake) Changing the ISO to suit the lighting conditions
- On a tripod: Once again, aperture (for the depth of field), this time low ISO (For clean image files when nothing is moving) Changing the shutter speed to suit the lighting conditions
That’s all for now. I hope that’s been helpful and not too simple.
If this has been helpful to you, please share it and subscribe to my mailing list to keep up with any new posts I write. And please let me know if you have any questions or if there’s something you’d like me to cover on a future post.
Have a great upcoming weekend. More soon.
JT
7 Comments on “Camera Mode & Food Photography”
Once again, great content, simple and clear. I am gateful
Thank you very much. Stay tuned for more and if you’d like me to cover something specific, do let me know.
Have a great weekend
JT
Great post!!
I’m definitely scared of manual mode but will try and give it a go. I mainly use AV mode. But I’m excited to expand my skills. Just need to get my head around it all!
Thanks for the info
Good to hear you’re going to give it a go. It’s really not as hard as you think. Once you start, it’s all creative gravy from then on in 😉
Thank you
This was very helpful for me,as a beginner!
Thanks very much!
I’m so glad it was of some help to you. Thanks for stopping by my blog and I wish you a very Happy New Year
Pingback: Shutter Speed – Sincerely, Gracie